显示标签为“Launch X-431 PRO3”的博文。显示所有博文

2020年11月13日星期五

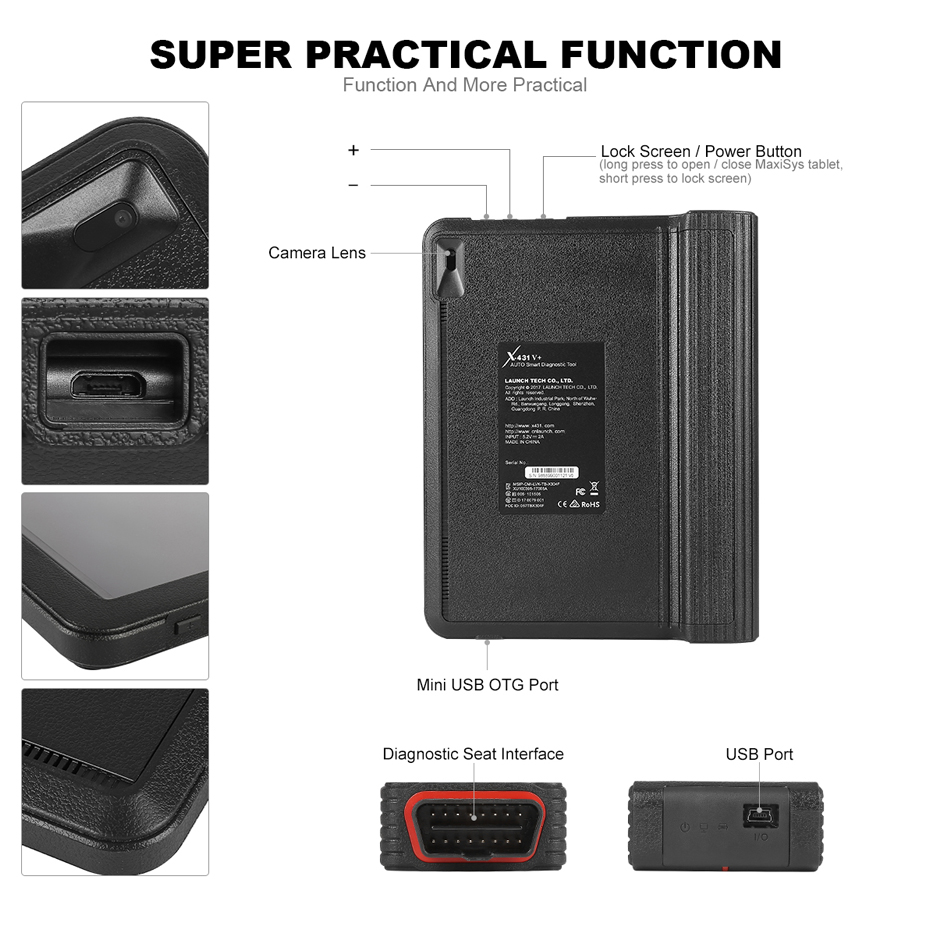
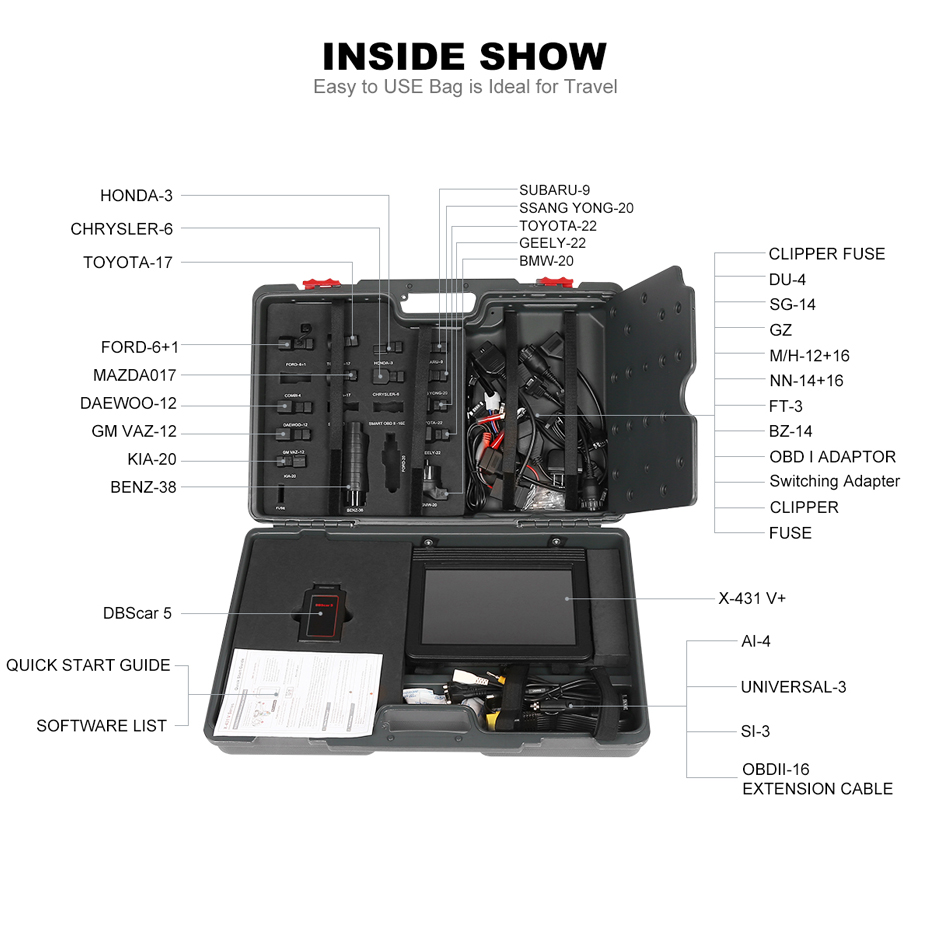
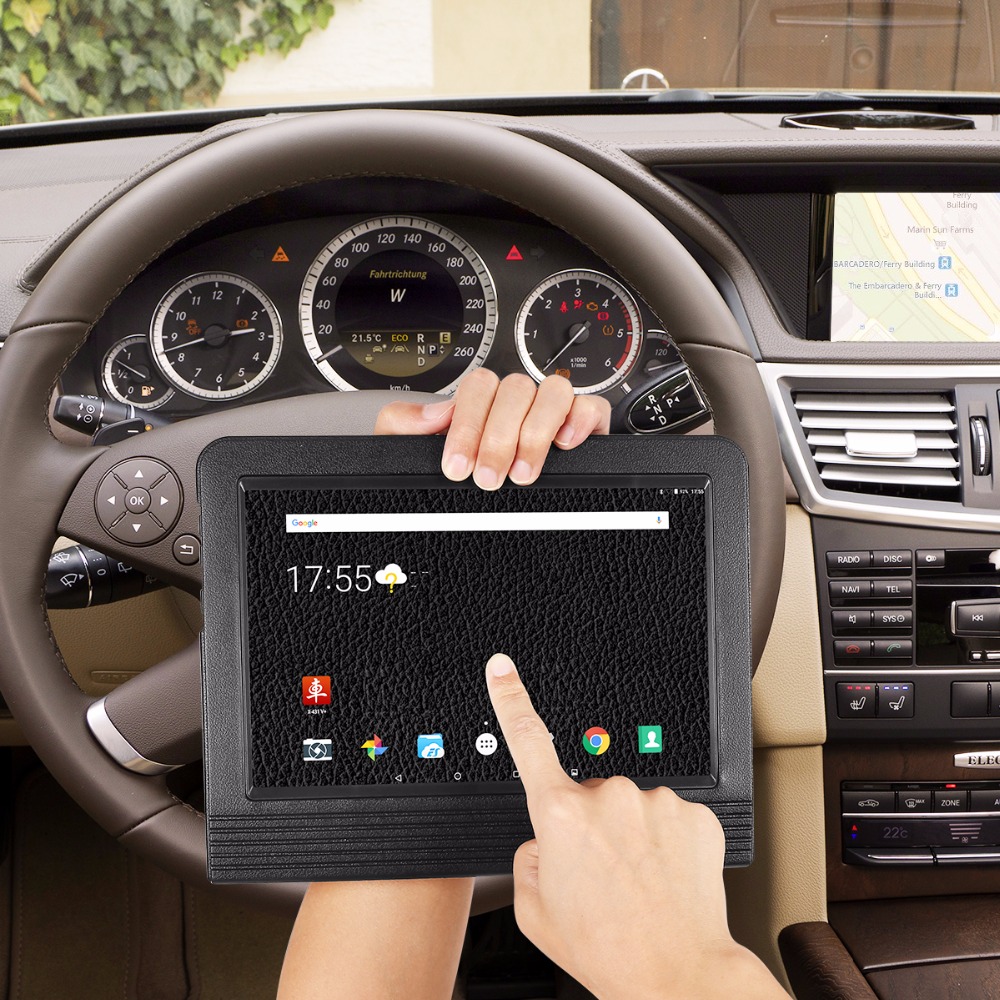
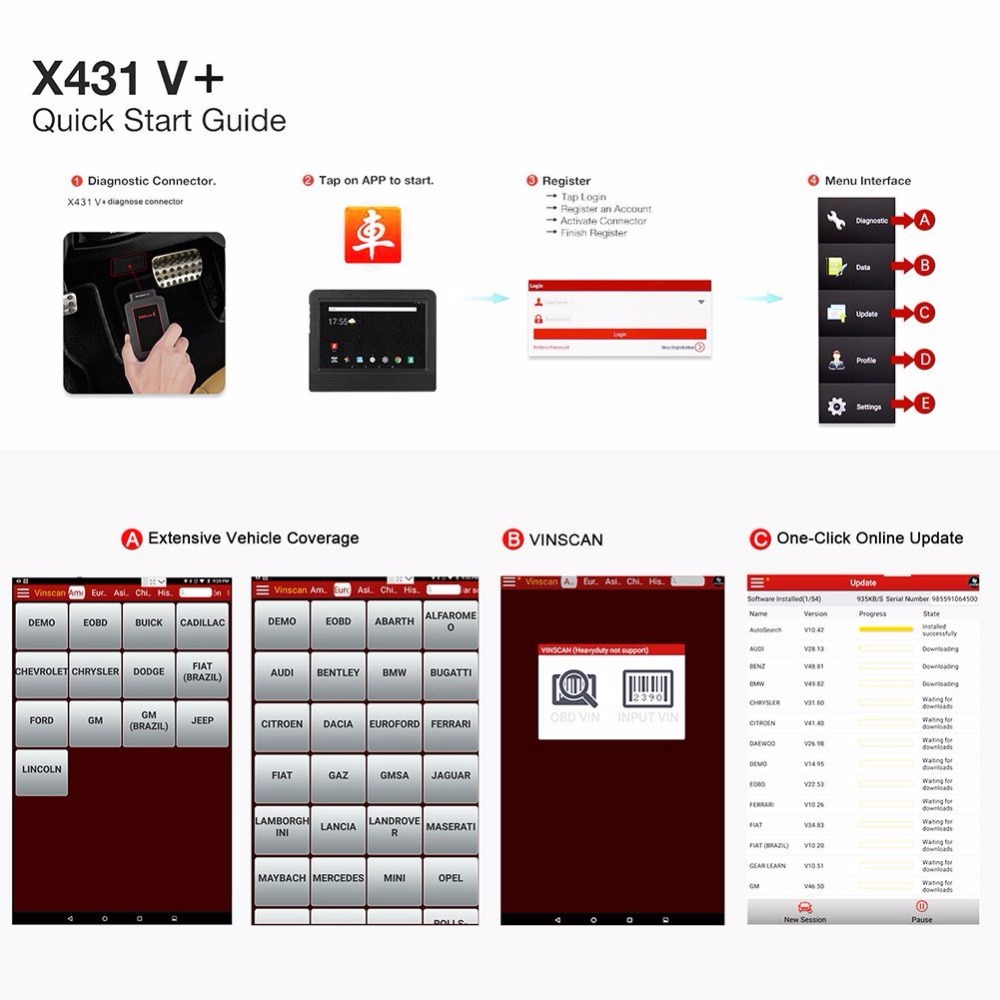
Launch X431 V+ Function information

 X-431 V+ taking the advantage of mobile internet, can share maintenance data and case library, provide instant maintenance information, and build public and private maintenance social circle,etc.,thus lead to wide car diagnostic community.


Functions:

1. Full Systems Diagnoses
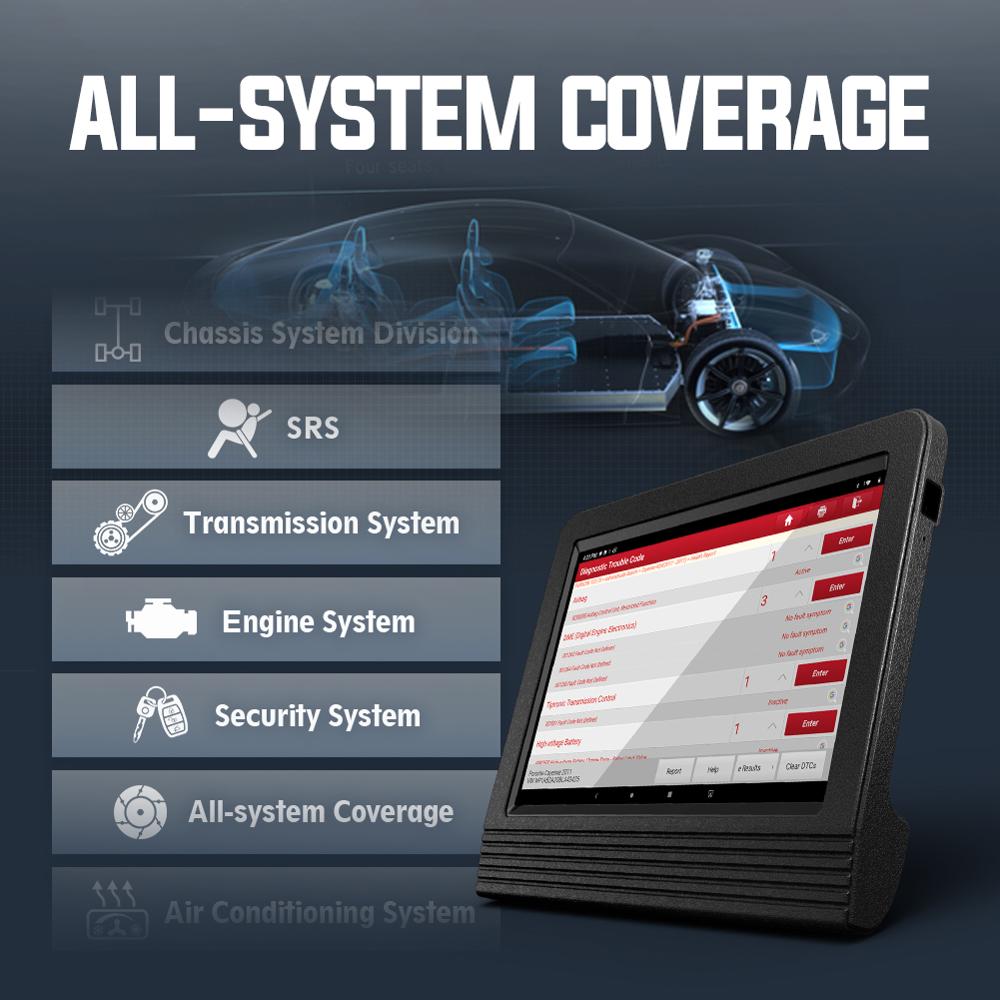
Original Launch X431 V+

1) ALL Systems Diagnoses

The diagnostic scanner X431 V+ enables you to scan full control units for a number of cars such as Engine, ABS, SAS, Transmission, Fuel system, Emission system, Body, and so on. Therefore, there is no need to buy other tools for diagnosing systems, saving you much time and money from the long term.

2) Coding and Auto VIN Tech

The Coding function is used to re-flash the vehicle control modules, it allows you to reprogram adaptive data for certain components after making repairs or replacements, providing ways for the issues of Drivability, Fuel Efficiency, Power Loss, Fault Codes, Durability of Mechanical Parts.It also supports identifying car’s information automatically rather than manually.

3) ECU CODING

Because every automobile actuator has a record code in ECU, which is the basis for automobile computer to mobilize their work. LAUNCH X431 V+ is equipped with advanced ECU coding function for addressing the following issues:

1. After you change the bad actuators or certain parts, you need to use this function to make a new code and recognize the new actuators.
2. By changing the code with the ECU coding, it’s easy to improve vehicle performance or stimulate high-end functions for the car.
3. ECU coding enables multiple car systems to recognize each other and then the actuators can start to work.

4) Wireless Bluetooth Diagnosis

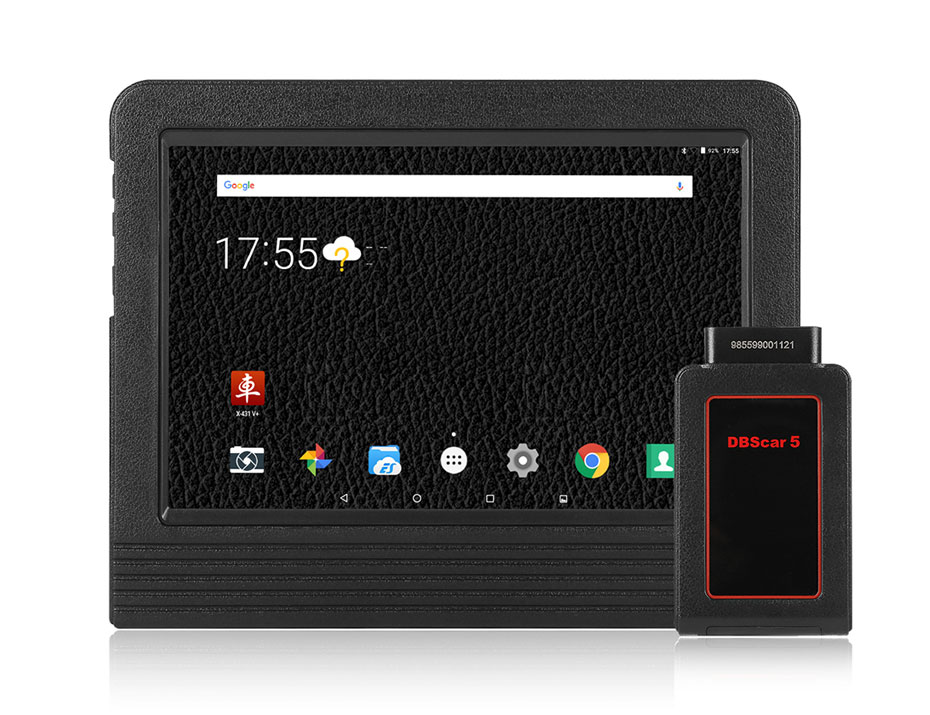
Different from diagnosing the vehicle via diagnostic cable, this diagnostic scan tool offers the users with much convenience due to the supported Bluetooth connection. Just plug the DBSCarII connector into car, and then connect it with X431 V+ through the Bluetooth. You are able to diagnose vehicles directly, either at your workbench or under the hood.

2. Special Functions
This diagnostic tool supports 11 special services and complete OBD2 functions. The former includes:

1). Oil Reset Service
Clear the Oil light, perform reset for the engine oil life system;

2). Steering Angle Calibration
Perform steering angle adjustment, clear steering sensor fault memory and turn off steering wheel warning light.

3). Electronic Parking Brake Reset
Reset the brake pad after repairs in electronic parking brake system are done.

4). Battery Register & Battery Maintenance
Re-match the control module and motoring sensor for battery detecting more accurately, clear original low battery information and prevent the related control module from detecting false information.

5). ABS Bleeding
Perform various bi-directional tests to check the operating conditions of Anti-lock Braking System (ABS).

6). Electronic Throttle Position Reset & Learn
Initialize the throttle actuators to the default state for regulating throttle (or idle engine) operations accurately.

7). Diesel Particulate Filter (DPF) Regeneration
Clear particulate matter from the DPF filter to stabilize the filter performance.

8). Tire Pressure Monitor System Reset
Reset tire pressure and turn off the tire pressure MIL.

9). Injector matching
Program in the new fuel injector numbers after replacement to replace the ones previously programmed into the ECU.

3. Additional Capabilities
Besides various wonderful capabilities in OBD2 functions, special services and full systems diagnoses, this diagnostic tool – Launch X431 V+ provides you with many additional services to facilitate your diagnosis.

1) ACTIVE TEST

Active test is to test output elements. You can figure out whether a specific subsystem or component in your car functions well or not by using this tool to make the tester outputs function instead of checking in ignition status.

This diagnostic tool supports active test (Bi-directional control) to request information or command a module to perform specific tests and functions. For instance, in the case of OBD II generic information Mode 1, you can initiate a request for information from the powertrain control module, and the PCM responds by sending the information back to the scan tool for display. This LAUNCH X431 V+ also have the ability to actuate relays, injectors, coils, or perform system tests, etc.

2) Technology Backup

You can get remote control tech support from LAUNCH tech team by sending one-click recorded videos and accurate diagnostic results to them. Also, the one-click update online feature is quite convenient.

4. More Reset Functions 
You can check the 5 reset functions in the car diagnostic software.

1). Air Suspension Reset
for Audi, Mercedes Benz, BMW, Citroen, Chrysler, Ford, GM (Cadillac, Chevrolet, GMC, Holden) Peugeot, Seat, Skoda, VW, ChangAnFord, DFCitroen, SGM, YQVW

2). Gearbox Reset
For BMW, Mercedes Benz, Chrysler, Ford, GM (Buick, Cadillac, Chevrolet, GMC, Holden, Hummer, Pontiac, Saturn), ChangAnFord, SGM (BUICK, CADILLAC, CHEVROLET, BUICK TRUCK), BYD, CHANGAN, Chery, Geat Wall, Geely

3). Sunroof RESET
For Mercedes Benz, BMW, CHRYSLER, Cadillac

4). AFS Reset (Adaptive Front lighting System)
AUDI, MERCEDES-BENZ, MG, CHRYSLER, GM (Cadillac, Chevrolet , GMC, Daewoo, Alpheon, PONTIAC, Holden, OLDSMOBILE, BUICK, SATURN, GMC TRUCK,
CHEVROLET TRUCK), OPEL, SEAT, SKODA, VW, SHVW, SGM (BUICK, CADILLAC, CHEVROLET, BUICK TRUCK), YQVW, BAIC, GREATWALL, CHERY, CHANGAN, ROEWE, YQJC, ZOTYE

5). EGR Reset
MERCEDES-BENZ, BMW, CITROEN, Chevrolet, Daewoo, Holden, PEUGEOT, RENAULT, VOLVO

1-4

These reset functions support different models and years of the car. If you want to know more information, please contact us with www.cnautotool.com.

2020年11月2日星期一

Launch X431 Pro3 FAQ


List most Launch X431 Pro3 Frequently Asked Questions.

1-4

1. Error -5 (new adapters)
Most likely your device uses the new security and work with it just do not happen, but you can try the following system:
1). If you should roll back its firmware 11.54 to version 11.52 (as flashing the adapter, see the section №4)
2). Turn off the Internet connection on the tablet / computer
3). Start the original application EasyDiag LAUNCH
4). Perform the connection to the vehicle via any program, for example EOBD2 (this is necessary to initialize the adapter)
5). Close the original application EasyDiag LAUNCH
6). Run PRO application
7). Perform n Connecting to the vehicle
– Use the brand until June 2017.
– On some adapters “focus” can not ride in this case is to use only original software

2. When you run any program there is a message «Realy Quit»
– It is necessary to update the adapter firmware is flash read in paragraph №4

3. Stamps are downloaded with an empty license file (LICENSE.DAT = 0 KB)
1). Try to install the application and download the brand through:
– For EasyDiag: easydiag.apk (26.19 MB Download now)
– For MDiag: m-diag.apk (27.09 MB Download now)

2). Sign up on the website and download the LAUNCH brand from-to: mycar. x431.com

3). apply power to the adapter, run the original application, the Internet on your tablet / smartphone must be turned on after connecting with the adapter program to overwrite the normal size of the license file

– If you have bought a new device and none of the above does not help feel free to contact provider apparatus with a claim to idle yc roystvo

4. How to flash adapter

To update the firmware on the shell X431 Pro3S 3.10.020 You will need:
1). Download the correct firmware: Archive of firmware (2.22 MB Download now)
2). Copy the firmware to your tablet / smartphone at «cnlauncn / X431Pro3S / 968 ******** * / the DIAGNOSTIC / the Configure / Download »
3). In« Download »will be based on two files« Download.bin »and« download.ini »folder
4). Launch X431 Pro3S application
5). The application, press Menu -> About -> firmware Restoration software
6). In the menu Restore firmware, press the red button “Restore firmware”
– Before the beginning of the firmware, check the charge battery on your tablet / phone
– If the firmware procedure on the adapter must be powered
– 968 ********* is the serial number of your adapter
– An example is given for the shell X431 Pro3S 3.10.020, in other shells path to the firmware file may be different

5. When you start the brand message Disaccording between the software serial No and smartbox serial No ….
Possible causes:
– Not a patch applied correctly
Invalid license file –

6. The shell does not see brands
Possible causes:
– Stamps copied down the wrong path , for example: for the shell X431 Pro3S 3.10.020 way for brands to be next:
cnlauncn / X431Pro3S / 968 ********* / DIAGNOSTIC / VEHICLES

In VEHICLES folder must lie folders trademarks, AUDI, BMW, RENAULT, etc.

– ********* folder 968 with the serial number of your device
– a folder cnlauncn be radically your tablet / smartphone filesystem

7. The computer does not see when connecting cnlaunch folder
1). Copy the folder cnlaunch to the SD card directly from the device using any file manager, eg Total Commander, then copy from the SD card to a computer
2). Create a copy of the folder cnlaunch directly from the device using any file manager, eg Total Commander, when it uses the new folder name, a new folder will be visible from your computer
3). Add cnlaunch folder to the archive directly from the device using any archiver, for example RAR, an archive will be visible to the computer
4). The most reliable method. Install the plug-in for Commander of Total All Android the ADB and work with the root file system of your device without restrictions

8. PRO application does not run on your phone / tablet, the original application is working properly
– Please update your smartphone / tablet firmware (on some devices do not start never)
Most becproblemnye smarfony / tablet – Samsung

2020年10月24日星期六

How to update internal memory for Launch X431 V+


This article is available with the method to increase internal memory for Launch X431 V+ . Check the step-by-step guide below.

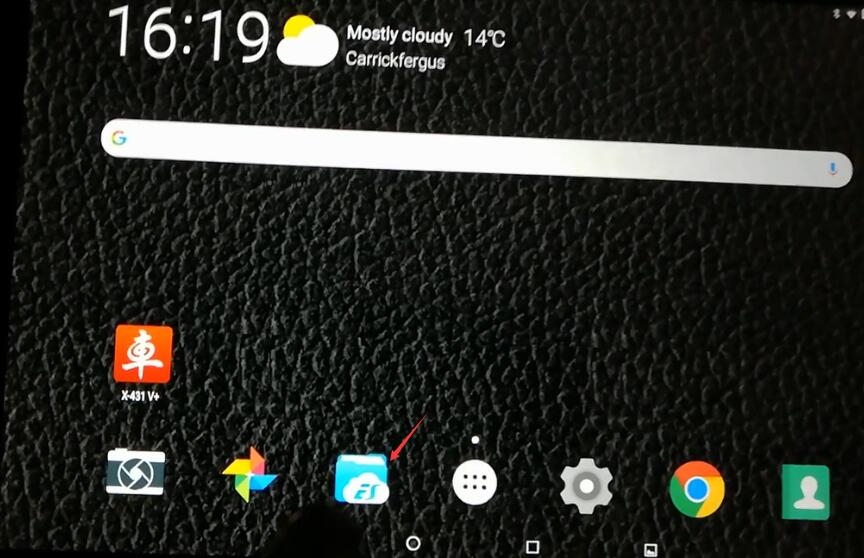
Open Launch X431 V+ main menu

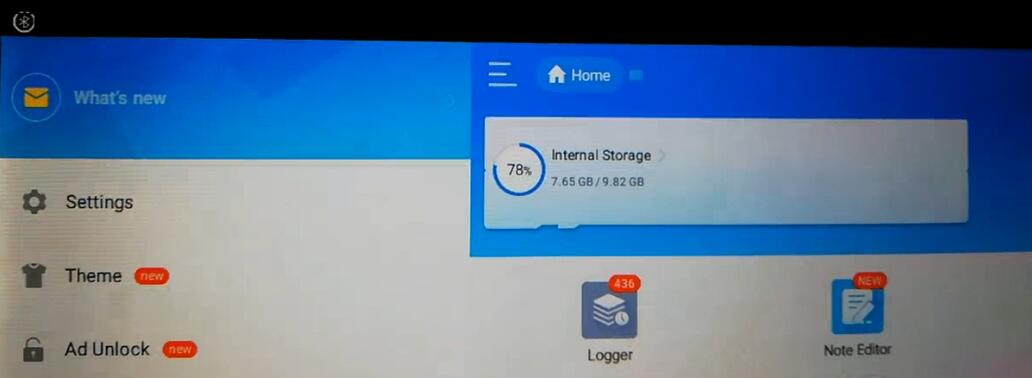
Select “ES” icon to check the current internal storage
11-1
11-2
11-3
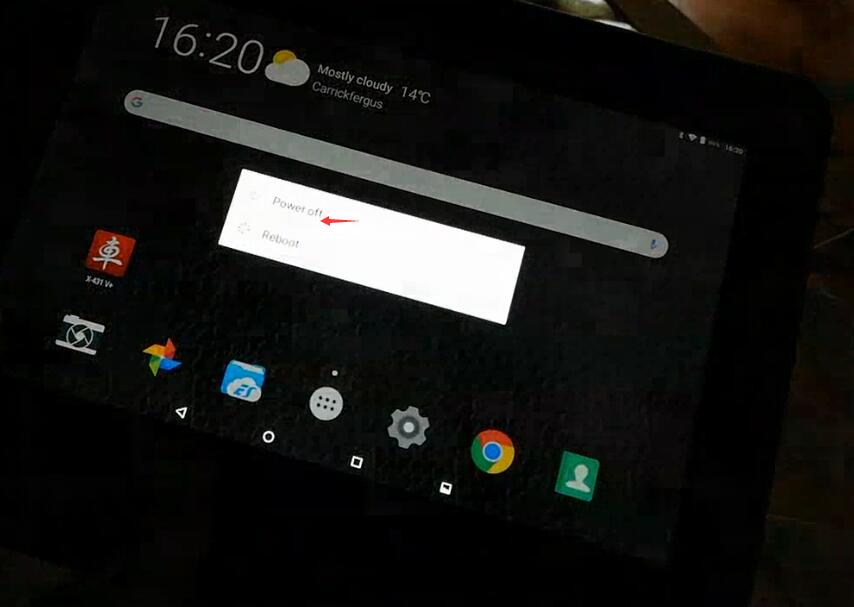
Power off the X431 V+ scan tool
11-4
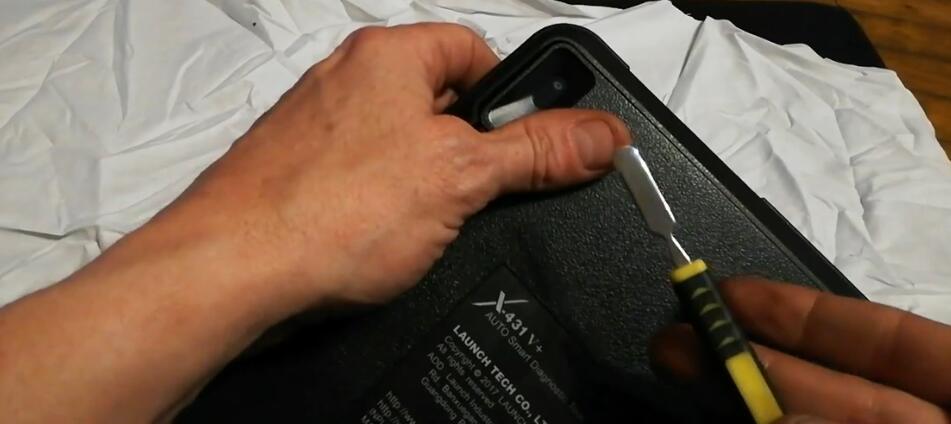
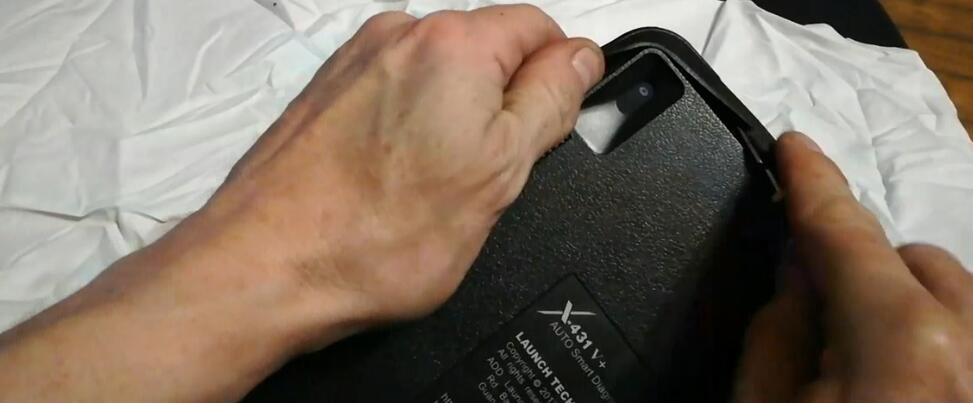
Remove the device soft shell with special tool
11-5
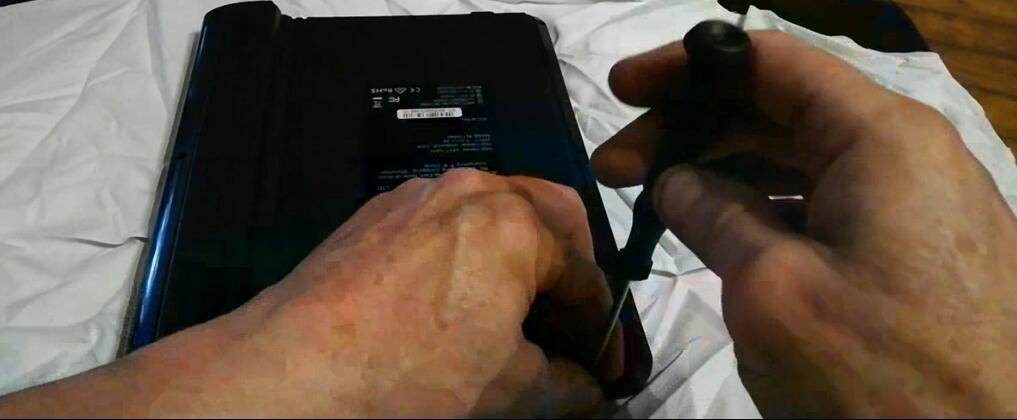
11-6

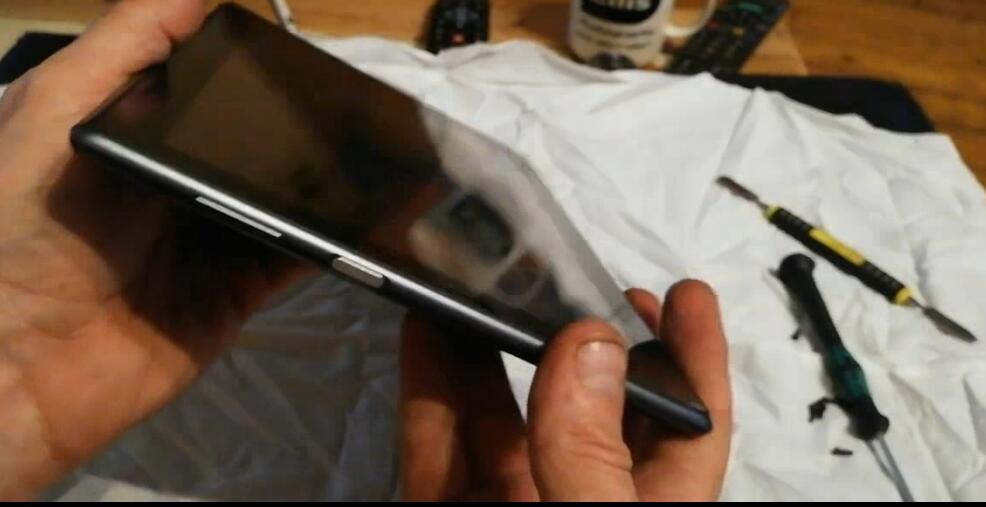
Remove the screws
11-7

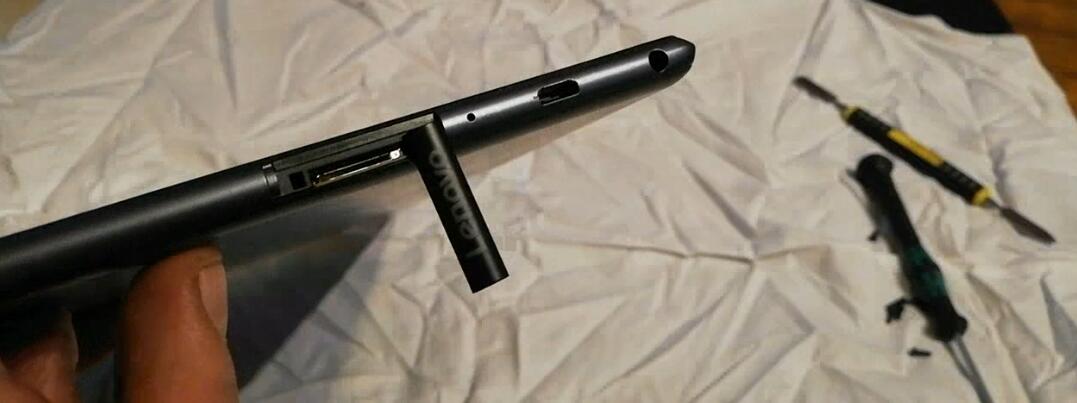
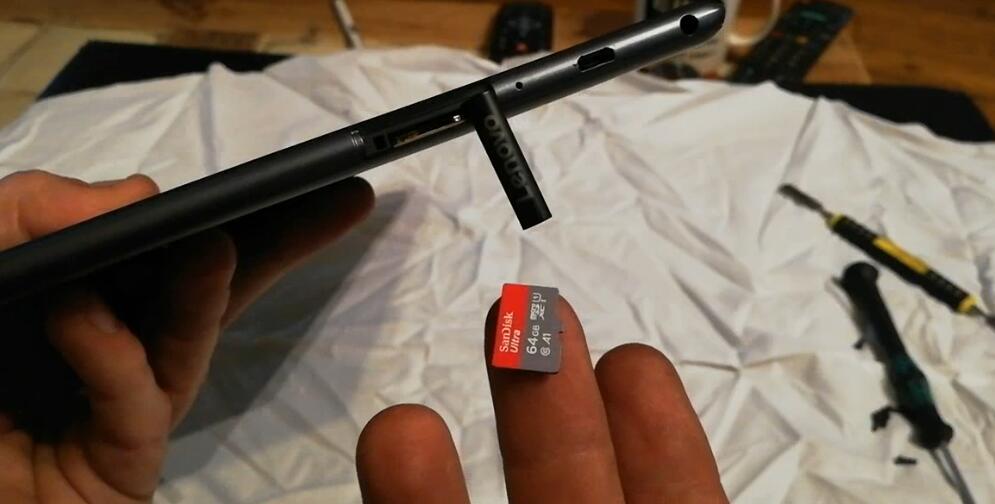
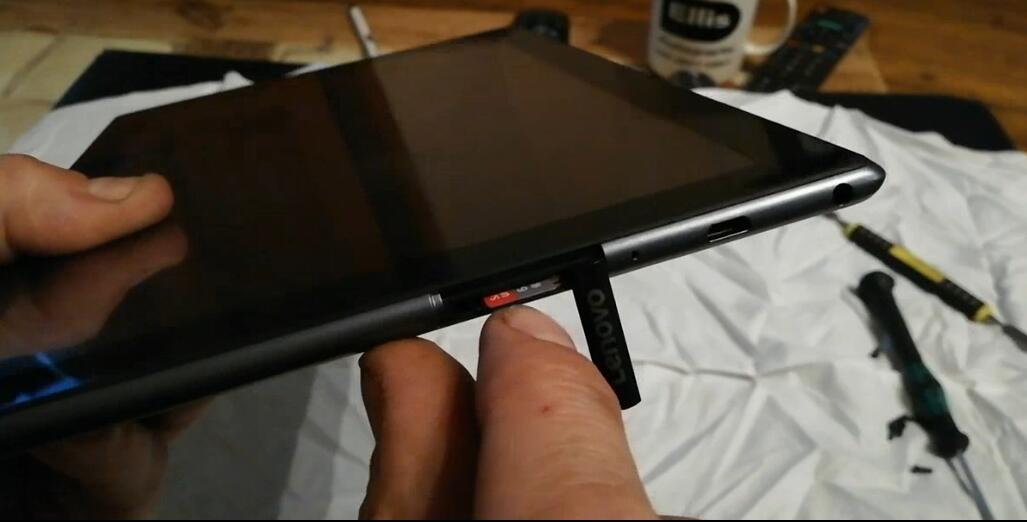
This is memory card slot
11-8
11-9
Insert a new large-capacity memory card into Launch X431 V+ (pro 3)
11-10
11-11

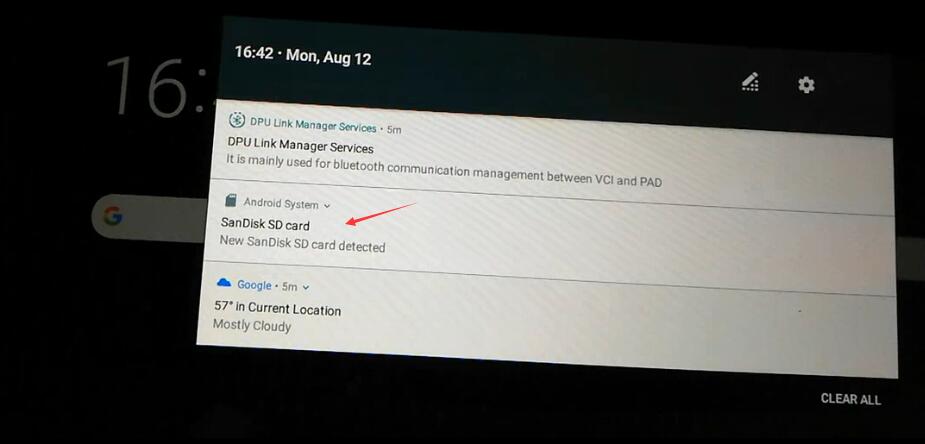
Power on the Launch diagnostic tool

Select “SanDisk SD card”
11-12
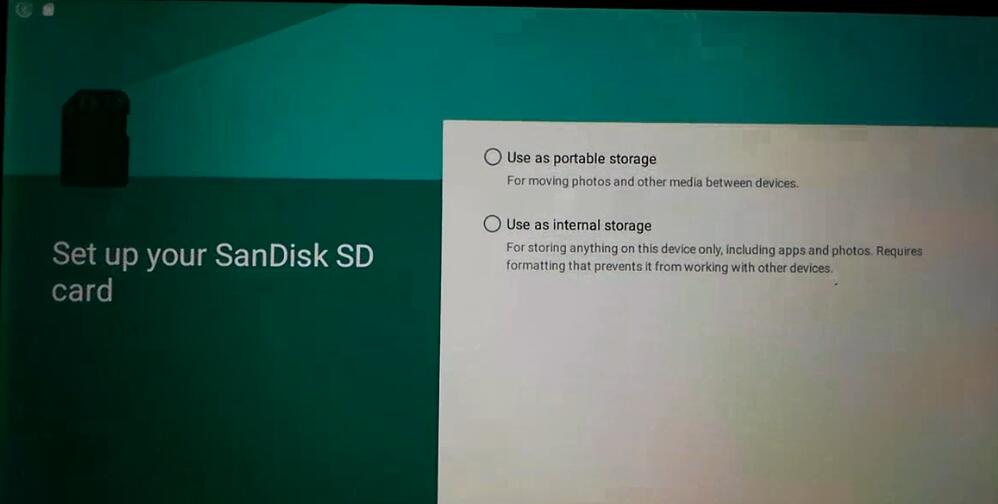
Set up your SanDisk SD card according to your need

1.Use as portable storage (For moving photos and other media between devices)

2.Use as internal storage (For storing anything on this device only, including apps and photos. Requires formatting that prevents it from

working with other devices)
11-13
That’s all! Hope it helps!

2020年10月21日星期三

How to update Launch X431 V/X431 V+ software?

 How to update Launch X431 V/X431 V+ software?
What are the advantanges of launch X431 V+?

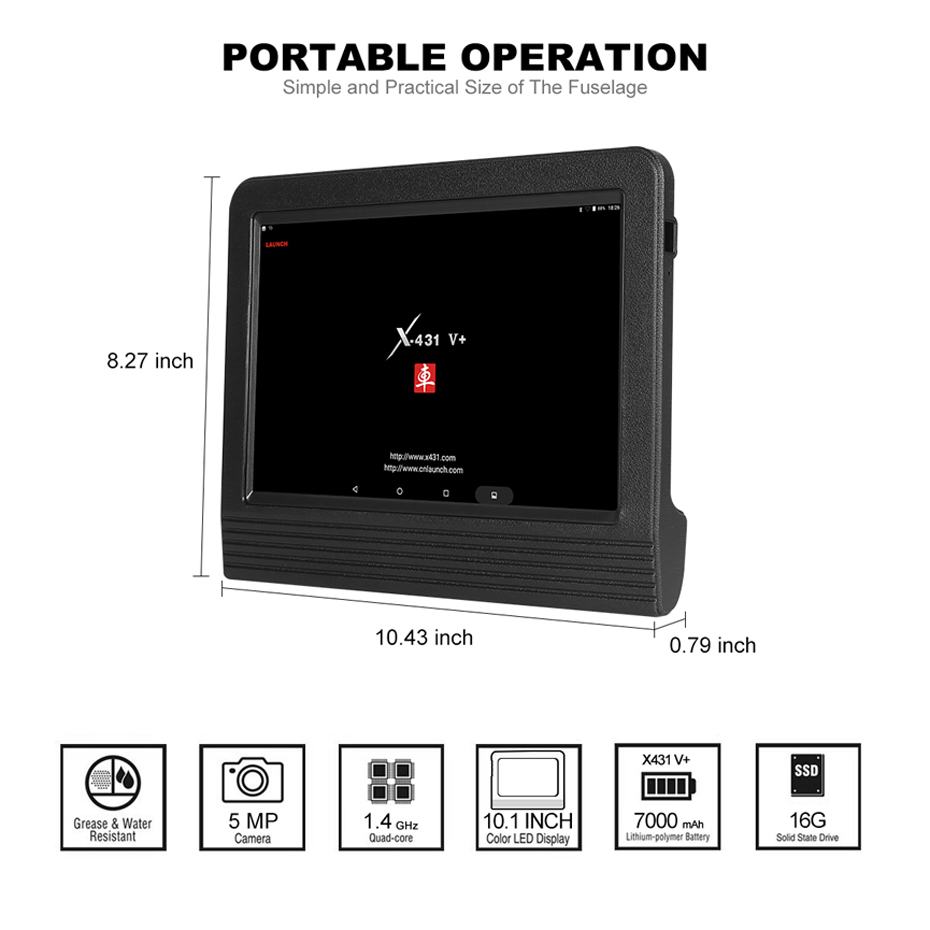
1. HUAWEI HiSilicon Quod-core 1.2G HZ, speed faster.
2. 1GB memory and 8GB storage for data.
3. Contain 72 car brand from USA, European, Asia and so on.
4. Support wifi/bluetooth and one click update, make your update job much easier.
5. 6600mAh Li battery can let you continue work 8 hours.
6. HUAWEI HiSilicon Quod-core 1.2G HZ, speed faster.
7. Original goods with full time technical service and guarantee.
8. 10.1 inch multi touch capacitor screen give you better view for diagnose and data stream.
Following OBD2TOOL share you How to update Launch X431 V/X431 V+ software?

How to update Launch X431 V/X431 V+ software?

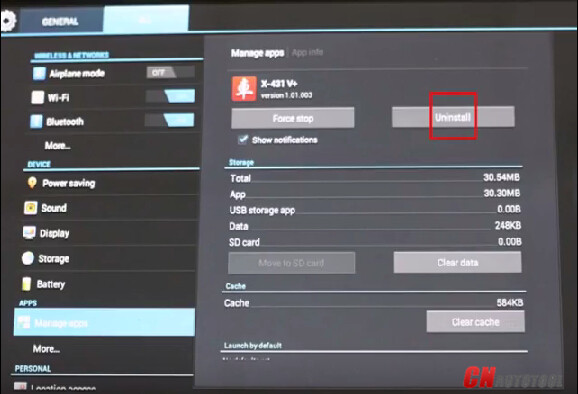
Step 1 Uninstall Launch X431 V+/Launch X431 V client
Two ways uninstall X431 V+ client
1) Click red box marked “1” above. Press on X431 V+ icon and push it up to the trash bin.
2) Click “Settings” >> select Manage Apps>> X431 V+ >>Uninstall
27-1
Step 2 Delete Files
This is X431 V client.
Find out “FileManager” in the Application
Click Memory Phone
Delete all files in this folder, press on the files and Delete icon will appear.
Step 3 Download Newest X431V / Launch X431 V+ Client
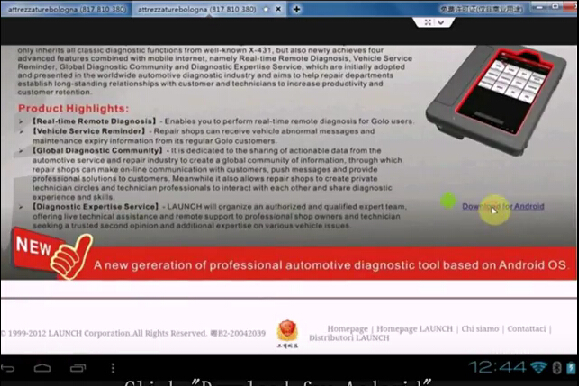
Browse Launch website www.cnautotool.com.
Click Category Product, select Launch V or V+.
Click “Download for Android” below X431 V image to start download client.

27-2
Downloading, please wait patiently, file about 19MB.
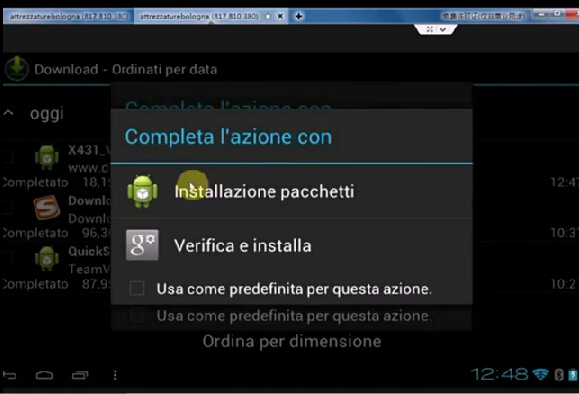
Double click X431_V.apk
Click “Installation Package” after complete download.
27-3
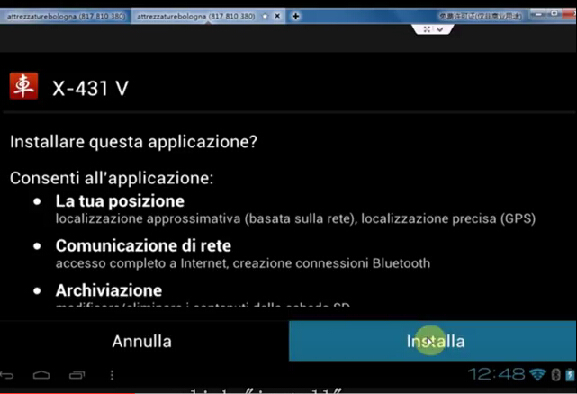
Click “Install”
27-4
Click “OK” when the system prompts to update
Click “Cancel”, because I haven’t login.
Step 4 Login
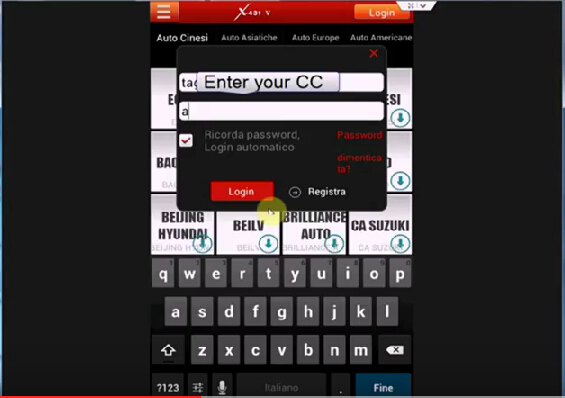
Login with your CC number and password
27-5
Read Claim, click “Read”
Select  Bluetooth Serial Number
27-6
Enter into function menu. Note: Customer Management is for users to add friends, mechanics and engineers etc to chat and fix technical problem.
Step 5 Download software
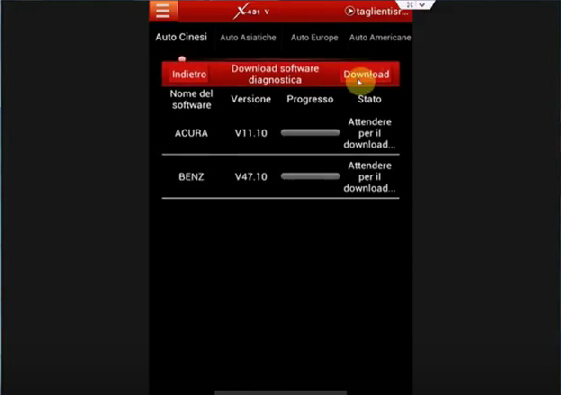
Click “Download”, this is old software version.
Select the vehicles you want to download. Note: the software downloaded from official site is the newest version
27-7
Click “following”
Click “Download”
After complete download, no vehicle software found, since its old version, exit the BDScar site, and login again to update.
Step 6: Update one car model software
Login www.dbscar.com, open X431 V, it prompts to update, click OK
Do not click Cancel, let it download program automatically, it will take less than 20minutes.
Click “Installation Package” after complete download.
Click “OK” to replace old application and the former information will be saved
Click “Install”
After complete download, the car models will display
Note: better not click “One Key Update” to update
Click “Association” to pair Bluetooth
27-8
Click “Reset”
Click “Yes” to activate Bluetooth
Step 7 Update more software
Back to the homepage, open X431 V client, the newest version will display.
On the “Updating” icon, it shows 72 makes available to update.
27-9
Select the car models and software version you want to update.
Check software

2020年6月30日星期二

How to use Launch x431 pro for diagnostic cars

After buying launch x 431 pro , We need begin use launch x431 pro for diagnostic cars.
First, Connect DBScar
Locate vehicle’s DLC socket. The DLC (Data Link Connector or Diagnostic Link Connector) is the standardized 16-cavity connector where diagnostic code readers interface with the vehicle’s on-board computer. The DLC is usually located 12 inches from the center of the instrument panel (dash), under or around the driver’s side for most vehicles. If Data Link Connector is not located under dashboard, a label should be there telling location. For some Asian and European vehicles, the DLC is located behind the ashtray and the ashtray must be removed to access the connector. If the DLC cannot be found, refer to the vehicle’s service manual for the location.
Plug the DBScar diagnostic connector into the vehicle’s DLC socket (It is suggested to use the OBD 2 extension cable to connect DBScar connector and DLC socket.). For non-16PIN DLC socket, please select the corresponding non-16 pin connector adaptor, then plug the non-16pin end of the adaptor into the DLC socket, and then connect the standard 16pin end DBScar connector.
LAUNCH X431 X-431 Pro Auto Diag Scanner for Android
The second, setting bluetooth for launch x431 pro diagnostic tool
Enter X-431 PRO Bluetooth setting screen (“Settings” –> “Wi-Fi” –> “Bluetooth”), slide the Bluetooth switch to ON and X-431 PRO will start searching available Bluetooth device, click the desired connector to piar and match.
The third, Start diagnosing
Take Demo as an example to demonstrate how to diagnose a vehicle. Start the software to enter vehicle selection screen. Click “Demo” to enter demo menu screen. Click “DEMO” to enter system selection screen. Click “Engine”, the system starts initializing and then jump to the function menu.

Launch X431 V+ Display :
42.1
42.2
42.3
42.4
42.5
42.6
If you have any suggestions about Launch X431 V+, please visit our website and contact us: sale@cnautotool.com

2020年5月2日星期六

Launch X431 V+ /X431 V / X431 Pro / X431 Pro 3 Diagnostic Tool FAQ

There is FAQ of Launch X431 V+ /X431 V / X431 Pro / X431 Pro 3:
1.How to save power?
Please turn off the screen while X431 V+/X431 V/ X431 Pro/X431 Pro3 keeps idle.
Set a shorter standby time.
Decrease the brightness of the screen.
If WLAN connection is not required, please turn it off.
Disable GPS function if GPS service is not in use
2.What should I do in case I forgot the screen lock?
You can set screen lock as pattern or password. If you forgot the password, please consult your device provider or reset your device.
Warning: Resetting may cause data loss. Before use, please make sure important data has been backed up.
3.How to do if the system runs slow?
In this case, please do the followings:
> Check all running applications and stop the unnecessary applications (Steps: Settings > Apps > Running > Tap the desired application and then tap “Stop”).
> Check all installed applications, remove the unnecessary applications (Steps: Settings > Apps > Downloaded > Tap the desired application and then tap “Uninstall”).
If all steps mentioned above are finished and the system still works slowly. Please try to close the system and reboot your X431 V+/X431 V/ X431 Pro/X431 Pro3.
4.How to handle when you encounter “Insufficient storage space”?
If this happens while downloading the diagnostic software, please proceed as follows:
Get your X431 V+/X431 V/ X431 Pro/X431 Pro3 username and password ready. If you forgot the password, please dial our hotline to retrieve it with the product serial number 98519*******.
Reset the X431 V+/X431 V/ X431 Pro/X431 Pro3 to the default factory settings (For details, please refer to Item 5 in this Chapter).
Tap “Settings”–>“WLAN”, choose the desired WLAN network to connect.
Open the browser and visit www.dbscar.com to download and install the latest App.
After the installation is complete, launch the application and login with your username and password.
Tap –> “Update” to download the diagnostic software.
Note: For new App, the software structure and storage space occupied by the vehicle softwares have been optimized so as to avoid the occurrence of insufficient storage.
5.How to reset X431 V+/X431 V/ X431 Pro/X431 Pro3?
Resetting may cause data loss. Before doing so, please make sure important data and information has been backed up.
Do the following to reset X431 V+/X431 V/ X431 Pro/X431 Pro3:
Tap “Settings”–>“Back & Reset”;
Tap “Factory data reset”;
Tap “Reset tablet”;
Tap “Clear all data” to start resetting until the tool automatically reboots.
6.Why some videos on the website can be not played?
It possibly results from:
The current browser does not support Flash playing;
Flash player does not support this video.
Try to use other browsers to watch it or install other Flash player.
7.The data and time of X431 V+/X431 V/ X431 Pro/X431 Pro3 can not be set.
It is because Automatic date & time is set on your X431 V+/X431 V/ X431 Pro/X431 Pro3. Tap Settings > Date & time, deselect “Automatic date & time” and then set the date and time manually.